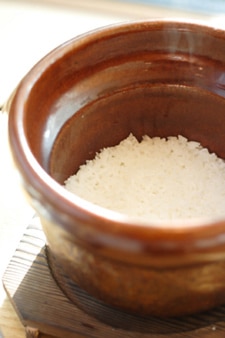
Fail-safe sushi rice using a pot

This is a simple way to make sushi rice if you don’t have a rice cooker. I don’t find the brand of rice to be as important as the cooking method. While some people may prefer Koshi rice, or their own favorite brand, any short grain style rice will do for sushi.
Place 500ml (2C) uncooked rice in a sieve or colander and rinse, agitating under running water for at least five minutes, until NO more white starch runs down the drain. Allow to stand and drain for at least fifteen minutes, although an hour is recommended.
Place washed sushi rice on stove with equal volumes of cold water (500ml water to 500ml rice). A heavy based stainless steel pot with a lid that seals well is essential – flimsy aluminum pots will let out the precious steam and burn on the bottom.
DON’T MESS WITH IT! Stirring will release more of the loose starch you’ve just taken all that time to remove. As soon as the water begins to boil, cover with a tight-fitting lid and turn the heat down as low as possible, just enough to maintain a gentle boil, for 15 min. Remove from heat and allow to stand covered for a further 15 min. DO NOT OPEN THE LID!
In the meantime, prepare your enzymes. For 500ml rice, I use:
- 75ml (5T) rice vinegar
- 10ml (2t) sugar
- 2.5ml (0.5t) salt
For a slightly zestier flavor, I enjoy replacing one tablespoon (15ml) of the rice vinegar with pure lime juice. Heating this slightly in a microwave helps dissolve the sugar. When the rice has stood covered for its 15 minutes off the heat, transfer it to a non-metallic bowl. Plastic or bamboo is best. Glass can be a bit sticky and any metal will affect the flavor due to reaction with the vinegar. Pour over the liquid and toss using a wooden spoon or large chopsticks. You want to get some air into the mixture to bring it down to room temperature – otherwise it’ll just continue cooking in its own heat and get stodgy.
This recipe has succeeded repeatedly for both sushi preparation (keep your hands wet) and as a sticky rice with Thai curries.